POSTS
AWS Gateway for inexpensive server-less functions
AWS Gateway lets you easily create inexpensive server-less functions.
The following is yet another simple tutorial on how to setup an endpoint on AWS linked to a server-less Lambda function. One of the main benefits of this approach is that you do not have to maintain any servers and you will only be billed for invocations of your functions.
The difference between an API Gateway and a Lambda Function is that the Lambda is code that AWS will run for someone with appropriate AWS permissions while the Gateway lets any user on the Internet call your function at a custom domain (possibly with rate limiting and web authentication).
That structure lets you efficiently build APIs, web sites, or other compute functions which are always available to your users but at a very low cost (especially since you the Gateway can provide rate limiting).
- Choose custom domain name
- Request AWS certificate
- Validate AWS certificate
- Create API Gateway
- Create Method Resource
- Deploy API
- Custom Domain Name
- Create API Mappings
- Point DNS to API Mapping
- Testing Setup
Choose custom domain name
To have your function easily accessible on the Internet, choose
custom domain name such as efunc.aocks.com (efunc stands for
example-function). For now just, choose the domain name as later
steps describe what to do with it.
Request AWS certificate
Request a certificate from AWS as discussed below and show in Figure 1 below.
- Go to AWS Certificate Manager (make sure to use the one for your AWS region).
- Enter your chosen domain name from the previous section.
- Fill out other parameters as desired.
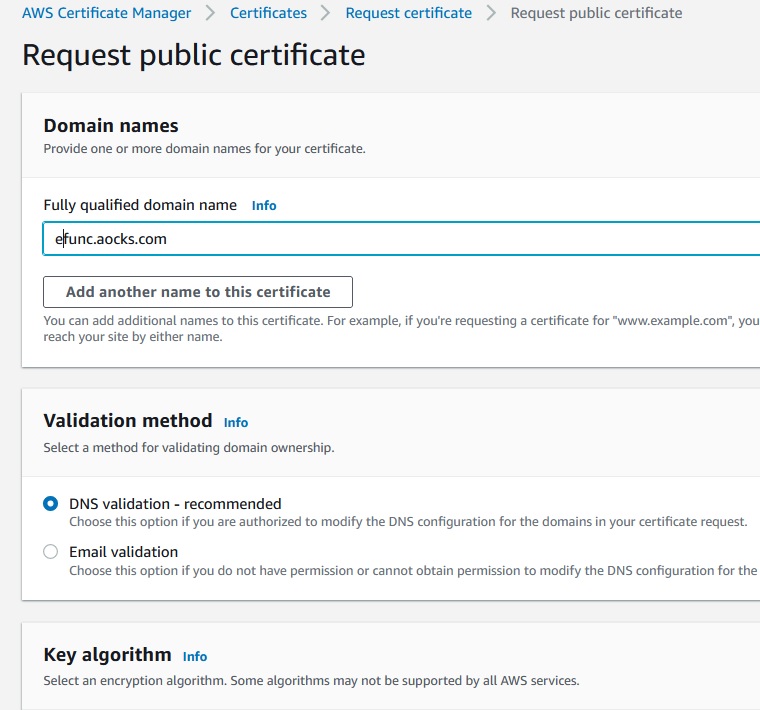
Figure 1: Getting a certificate from AWS.
Validate AWS certificate
After you request a certificate, AWS will provide it as “pending” in
your list of certificates and give you a pseudo-random CNAME to
validate the certificate. You will need to go into the DNS settings
for you domain (e.g., at Go Daddy, Google Domains, Route 53 or
whatever DNS provider you use) and create a new record with:
- type:
CNAME - name: as provided by AWS
- value: as provided by AWS
It may take a short time for your new DNS settings to propagate and get verified by AWS.
Create API Gateway
Go to the AWS API Gateway service and create a REST API or HTTP API depending on your needs. You will need to choose a name for your API and possibly some other API parameters. The HTTP API is cheaper and simpler but the REST API includes per client throttling which is a nice feature.
In a later step, you will setup the custom domain
Create Method Resource
Now that you have created an API, you need to create a method by
clicking on the Resources tab, clicking the Actions button, and
choosing Create Method as shown in Figure
2. In this example, we link the method to an
existing AWS Lambda function (see AWS docs for instructions on how to
create a Lambda function if necessary).
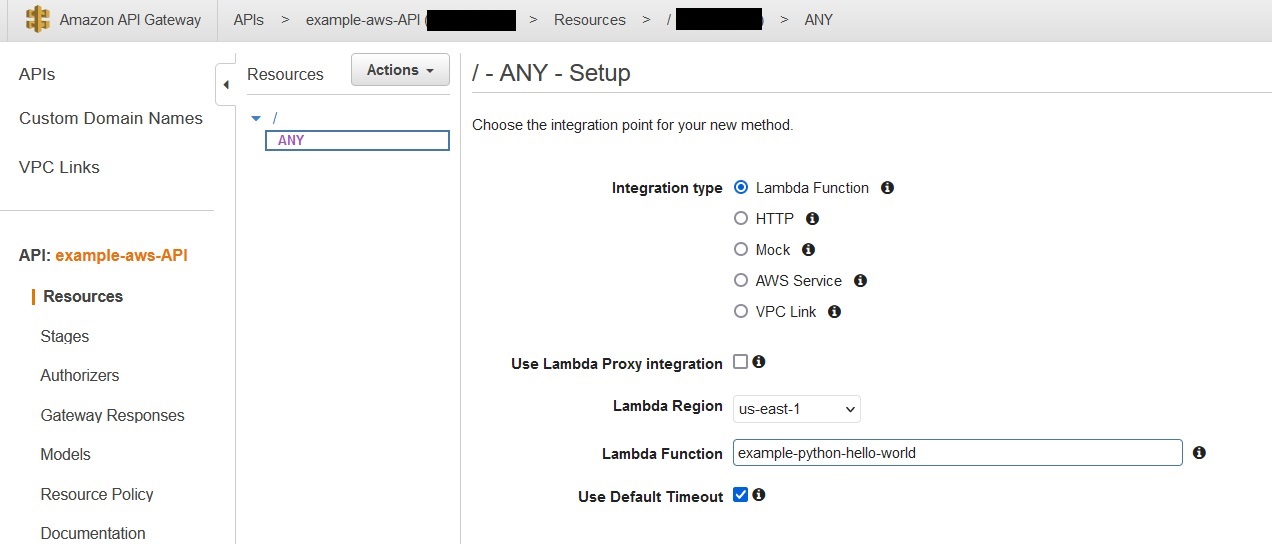
Figure 2: Create a method for your API.
Deploy API
Before proceeding, you should deploy your API by clicking on the
Resources tab, clicking the Actions button and deploying as shown
in Figure 3 and then selecting a new stage to create
as part of the deployment.
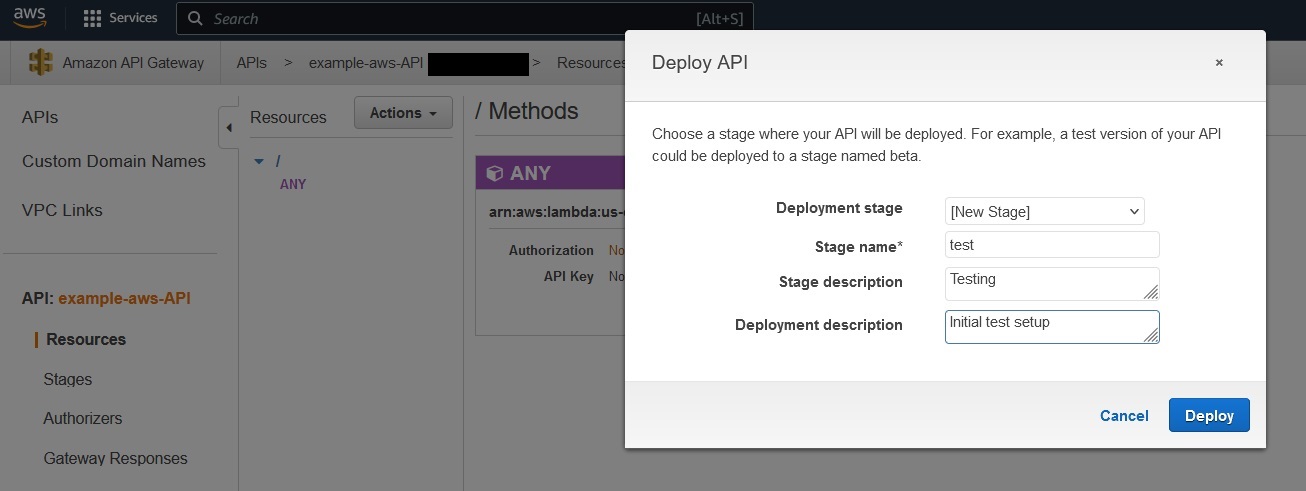
Figure 3: Deploy your API.
At this point, you may also want to configure throttling for your API.
Custom Domain Name
Once you have created the API Gateway, you should then be able to click on the tab to create custom domain and provide the domain as shown in Figure 4.
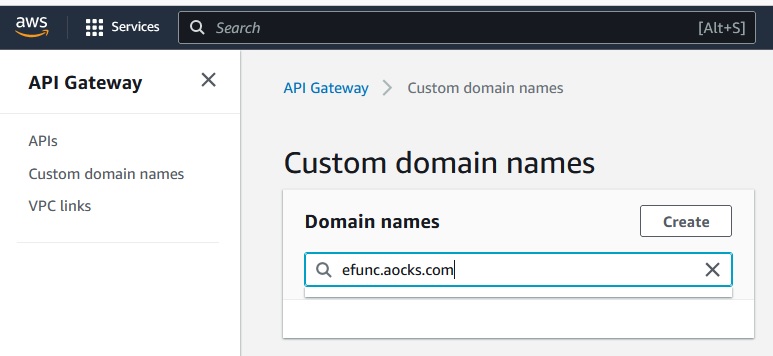
Figure 4: Creating a custom domain name for your API.
This will take you to a form where you provide the “Domain details”,
“Endpoint configuration”, and “Tags”. Use the custom domain name you
have selected (e.g., efunc.aocks.com in this example) and the
certificate you created previously and click the “Create domain name”
button at the bottom right of the form.
Create API Mappings
Now that we have an API gateway associated with a custom domain, we need to create the “API mappings” to associate the API with the domain. Click on the “API mappings” tab shown (see Figure 5), then click “Configure API mappings”
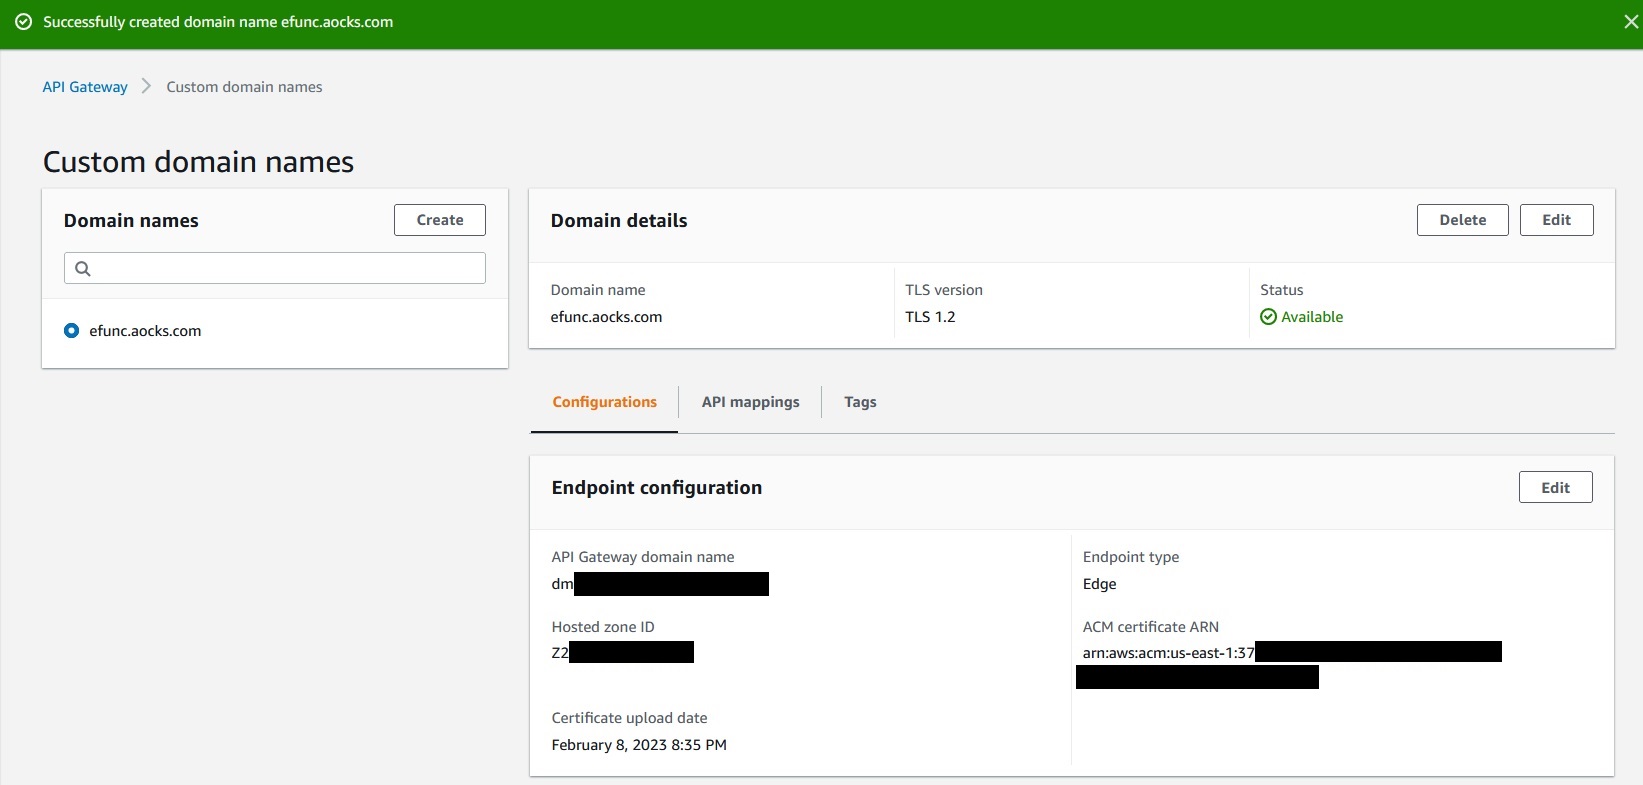
Figure 5: Creating mappings for API.
Finally, select the previously created API and the desired stage deployed, and click “Save”.
Point DNS to API Mapping
The last step is to point your desired domain name at the API mapping
as shown in Figure 6. Note that there are
multiple URLs floating around this process so make sure you find the
one shown under “API Gateway domain name” (it should start with the
letter d).
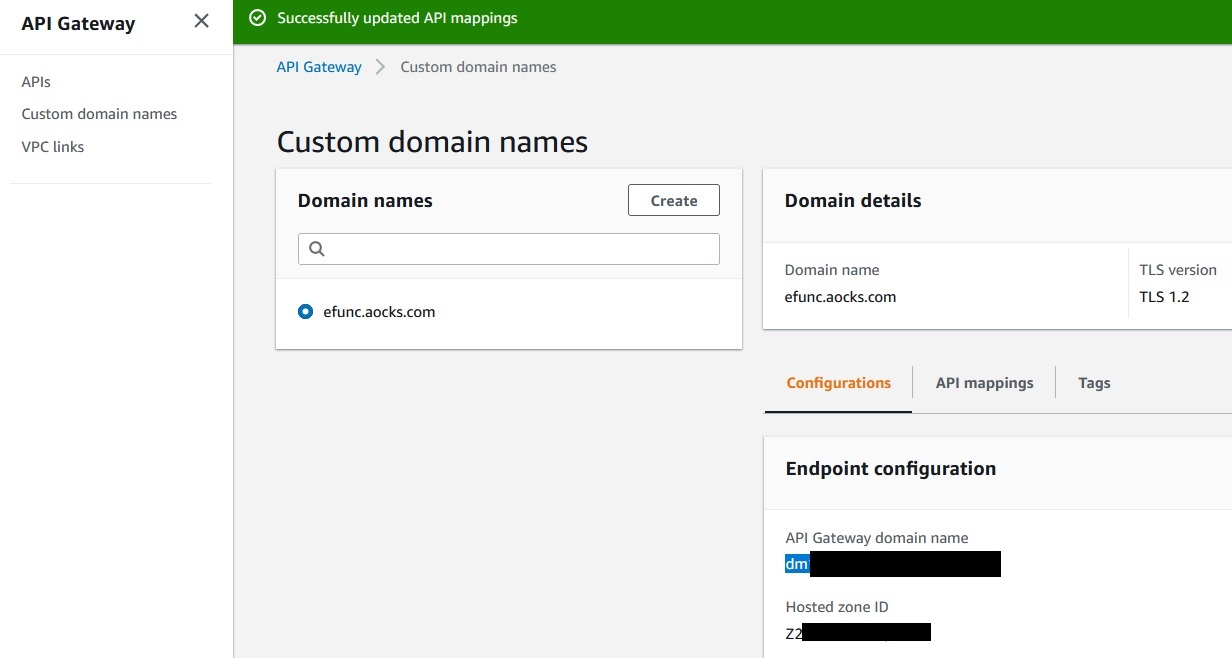
Figure 6: Point your DNS to the URL provided by the API mapping.
You need create a CNAME value in your DNS settings pointing your
custom domain name (efunc.aocks.com in this example) to your “API
Gateway domain name”.
Testing Setup
Finally, you can test your setup using curl to send a GET request to
the new endpoint:
curl https://efunc.aocks.com \
  -H 'Content-Type: application/json' \
  -d '{"key1": "f1","key2":"f2","key3":"f3"}'